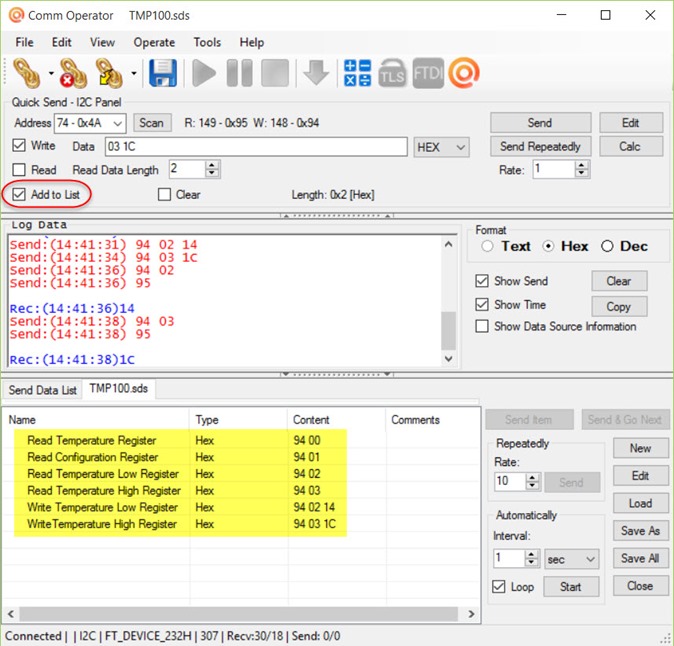
Comm Operator v4.9 supports Quick Send – I2C Panel. It allows to you communicate with I2C devices through FTDI FT232H based USB to I2C bridge.
Here’s how to test I2C device TMP100 with Comm Operator I2C Panel.
Download Comm Operator v4.9 beta version to try.
Step 1: Download and install Comm Operator.
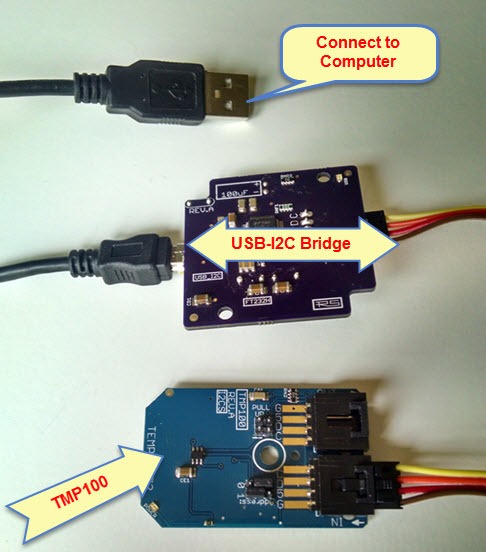
Step 2: Connect I2C device TMP100 with your computer through FTDI FT232H based USB to I2C bridge.
Step 3: Run Comm Operator, and Open Connection –> I2C Bridge to connect I2C device TMP100.

Step 4: Click menu View –> I2C Panel to show Quick Send – I2C Panel.


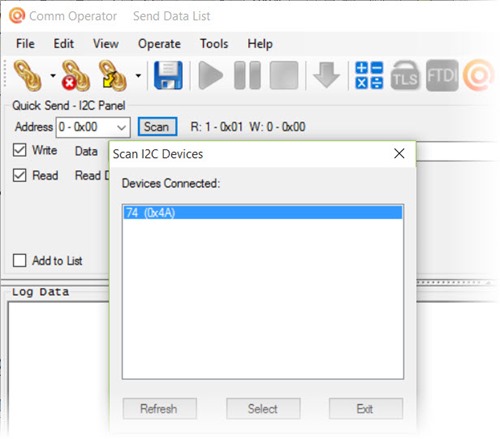
Step 5: Click Scan button to search I2C device TMP100 address.
If you know the device address, you can just select it from the drop-down list.

Step 6: You can communicate with I2C device TMP100 now.
For example:
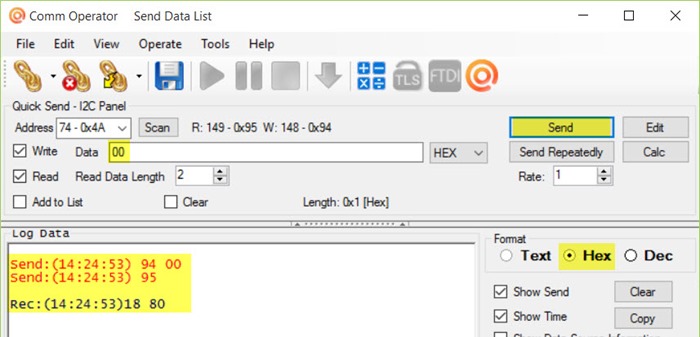
According to I2C protocol and I2C device TMP100 document, check Write and Read, and input data ”00” (it’s Pointer Register of TMP100. “00” indicates Temperature Register), then click Send button to read the value of Temperature Register.
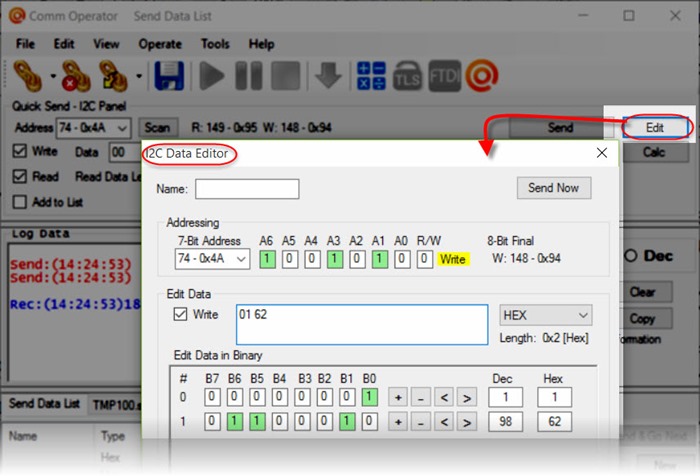
Step 7: Click Edit button to show I2C Data Editor. You can edit address and data here in binary.
Step 8: Check Add to List when you send data to I2C device TMP100, the data will be added to Send Data List automatically. It’s pretty handy to save the list for later use. You can also Download TMP100.sds file, and load it in Comm Operator directly to test your TMP100 I2C device.

