
N-Button software allows you to create widgets to control relay boards. It also supports several Automation control rules. You can not only simply turn relay on or off, but set up Automation rule to control relays.
Here will show you an example about how to set up conditional rule to control relays.
Task: Turn Relay 3 ON automatically when Relay 1 and Relay 2 are switched ON
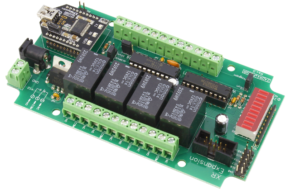
Note: I am testing with the ProXR relay board from National Control Devices. It also works for the relay board from Robot Electronics and Velleman, which are supported in N-Button. If you would like to have your relay board supported in N-Button software, please contact us.
Step 1: Be sure you already installed N-Button software, connected the relay board to your computer.
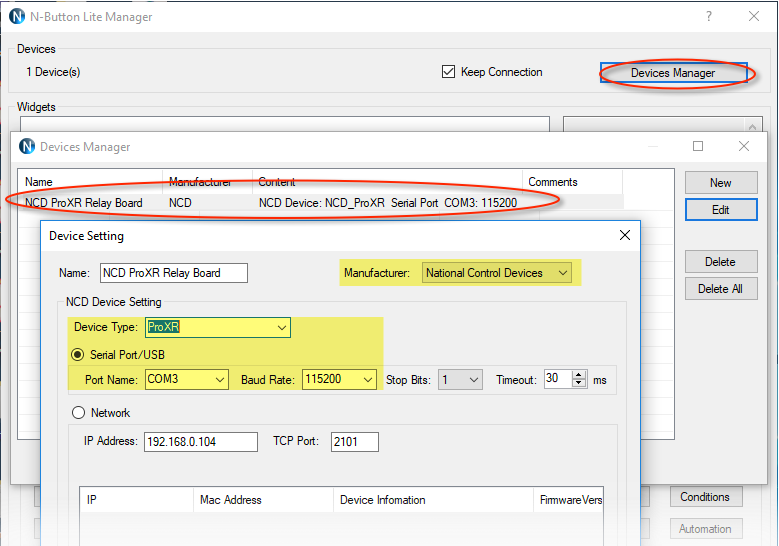
Step 2: Run N-Button software, add the relay board to Device Manager.
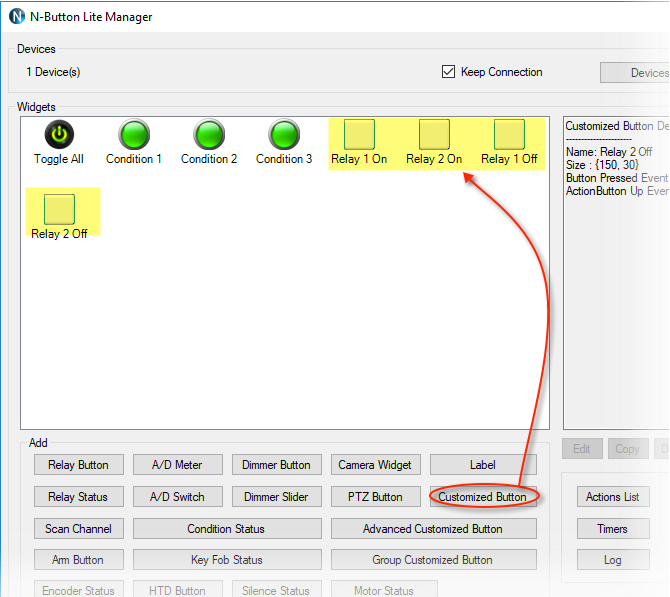
Step 3: Add a Relay Button to toggle all relays.

Click OK to close N-Button Manger, you will see the Relay Button widget on your desktop. Click the button to turn on/off all relays. This is to make sure the connection is valid, and the relay board works well with N-Button software.

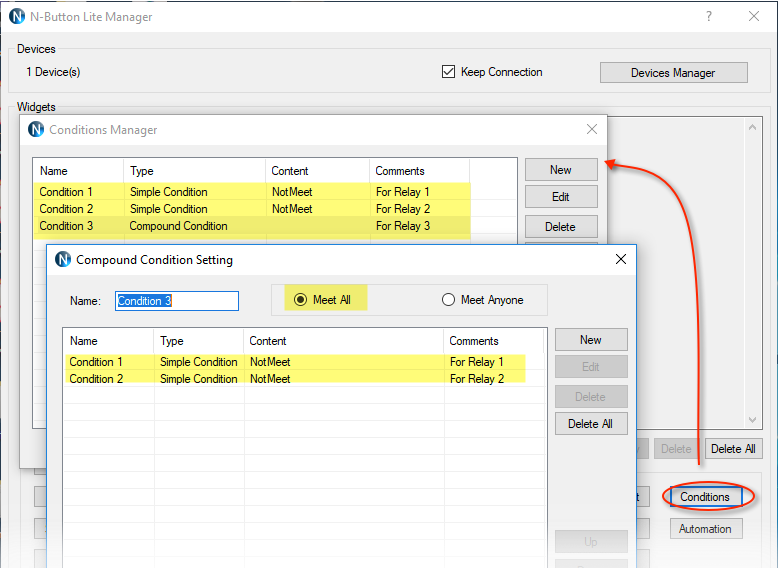
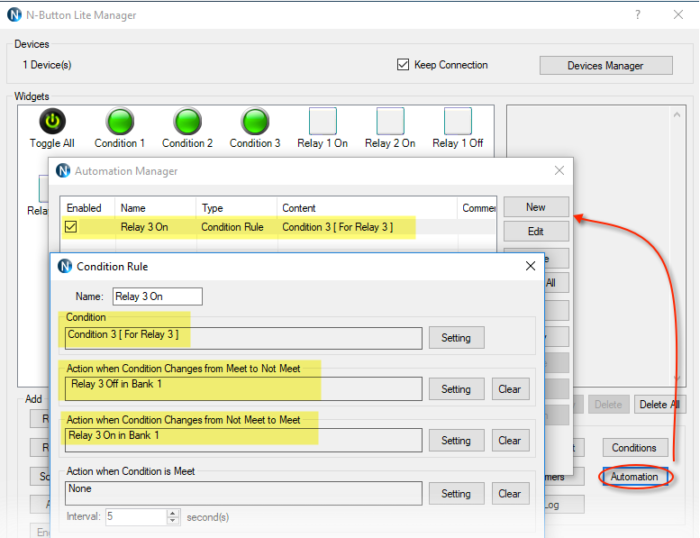
Step 4: Right-click the Relay Button to reopen N-Button Manger. Open Conditions Manager, add 3 Conditions to mark the relays’s status.
- Condition 1: Simple Condition for relay 1, initial status is Not Meet
- Condition 2: Simple condition for relay 2 ,initial status is Not Meet
- Condition 3: Compound condition for relay 3, which include above two simple conditions, select Meet All.
Step 5: Add 3 Condition Status widgets to show the status of Condition 1, Condition 2, and Condition 3. This step is optional. It just lets you see the status clearly.

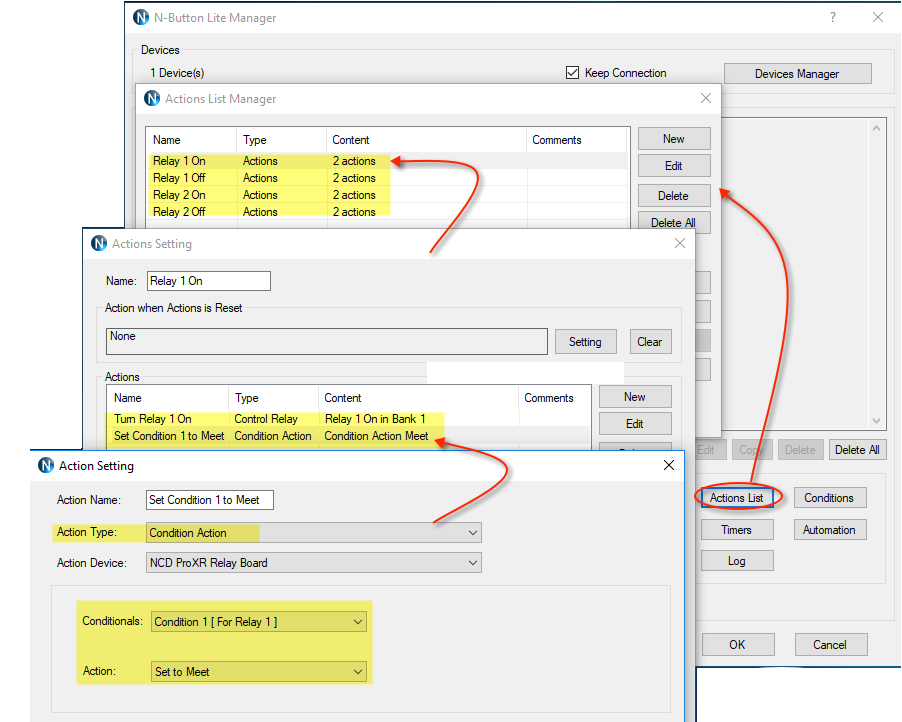
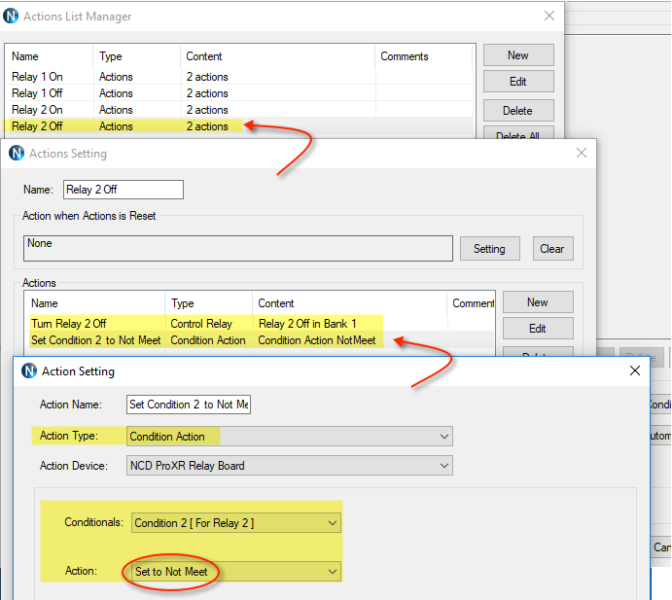
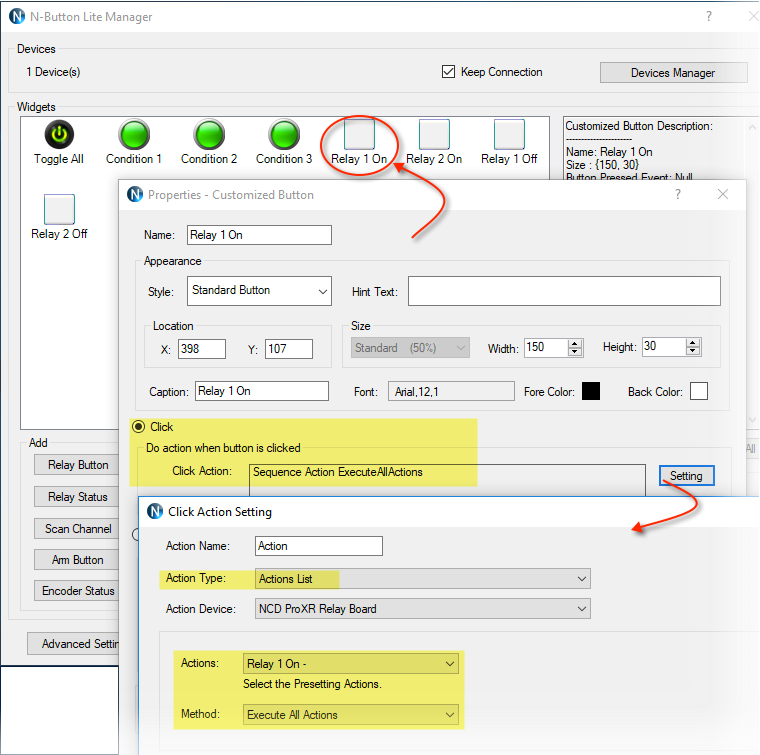
Step 6: Open Actions List Manager, add 4 Actions Lists to switch Relay 1 and Relay 2 separately together with related conditions. The Actions list includes:
- Relay 1 On – Turn Relay 1 On and Set Condition 1 to Meet
- Relay 1 Off – Turn Relay 1 Off and Set Condition 1 to Not Meet
- Relay 2 On – Turn Relay 2 On and Set Condition 2 to Meet
- Relay 2 Off – Turn Relay 2 Off and Set Condition 2 to Not Meet
Step 7: Add 4 Customized Buttons to do the Actions List for Relay 1 On/Off and Relay 2 On/Off.
Step 6 and Step 7 are make sure to
- Set Condition 1 to Meet when Relay 1 is ON, and set Condition 1 to Not Meet when Relay 1 is OFF.
- Set Condition 2 to Meet when Relay 2 is ON, and set Condition 2 to Not Meet when Relay 2 is OFF.
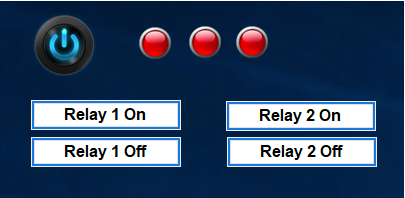
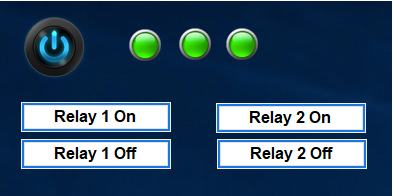
When you click the buttons Relay 1 On and Relay 2 On, you will see the Condition Status widget will turn to Green. That indicates the Condition 1 – 3 are all in Meet. Click the buttons Relay 1 Off and Relay 2 Off, the Condition Status widget will turn to Red. Then Conditions are all in Not Meet.
Step 8: Open Automation Manger, add a Condition Rule for Condition 3.
- Set Turn Off Relay 3 for Action when Condition Changers from Meet to Not Meet.
- Set Turn On Relay 3 for Action when Condition Changers from Not Meet to Meet.
After finishing all above settings, click the Customized Buttons to turn Relay 1 and Relay 2 on, you will see Relay 3 is ON automatically. When you turn Relay 1 or Relay 2 off, Relay 3 will be switched to off.
This is just a simple example to control relays with Condition rule. There are more ways to control relays with N-Button software. See another example with Condition rule is to avoid Relay 1 and Relay 2 to be ON at the same time.