
It is easy to create a virtual Key Fob on your desktop with N-Button Lite to control a relay on/off from computer.

Step 1. Download N-Button Lite
Step 2. Install N-Button Lite and Open N-Button Lite Manager

Step 3. Setup the Relay board type and serial port or network parameter correctly according the your hardware type. Get a Relay board from NCD.
Step 4. Add a Key fob image as background. Here is the picture.

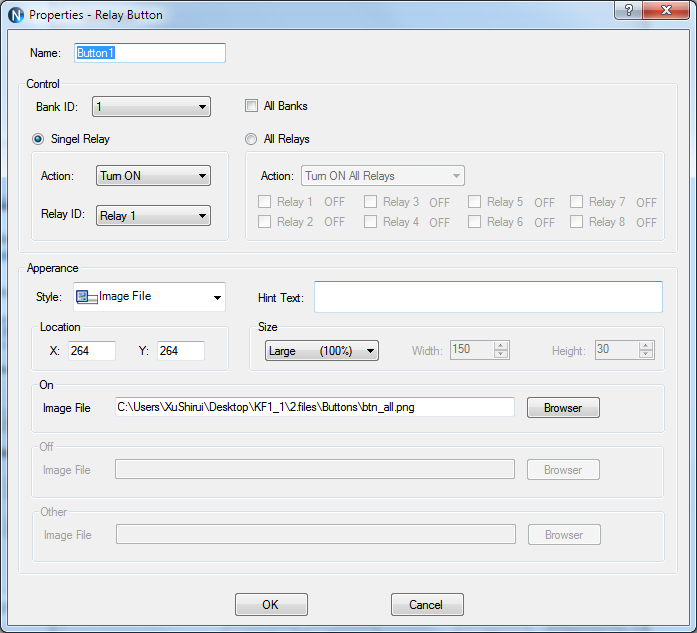
Step 5. Click “Add Relay Button” to show the dialog Properties – Relay Button.

Step 6. Set Action to “Turn On” and select Relay ID you want to control. Set Style to “Image File” and Size to “Large 100%”. Select Image File for button. Here is the picture.

It should include the status of normal and button pressed. The two parts need to be same size. Please refer “How to Prepare Button Images for N-Button” for how to make it.
Step 7. Click “OK” to return N-Button Lite Manager dialog.
Step 8. Click “OK” to close N-Button Lite Manager dialog.
The key fob image and button will show on top left of the screen. Drag the button to center of key fob and drag the key fob to the place you want. Right click on the background image to uncheck the “Move” and check “Move All”.
That’s it! You have a virtual key fob on your desktop.
You can download the configuration file for key fob and load it directly in N-Button Lite Manager dialog.
Download Virtual Key Fob Configuration File
Video: How to Save and Load Configuration File for N-Button