|
1. How to Install
Required Hardware
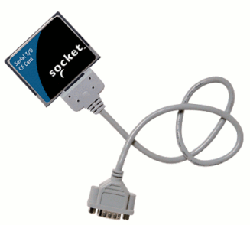
About the serial adaptor cable, one solution is a Compact Flash to Serial adaptor
such as the Serial I/O CF Card manufactured by Socket. Another option is to obtain
a serial adaptor that connects directly to the synchronization port of the Pocket
PC.
Install Relay Timer R4X PPC
- Connect the Pocket PC to the desktop PC and ensure that
ActiveSync is operating correctly.
- Run Relay Timer R4X PPC setup executable file on your desktop
PC and follow the installation wizard.
Another way to install Relay Timer R4X PPC:
- Copy Relay Timer R4X PPC setup *.cab file from desktop PC to
Pocket PC.
- Run the *.cab file on Pocket PC to finish
intalling.
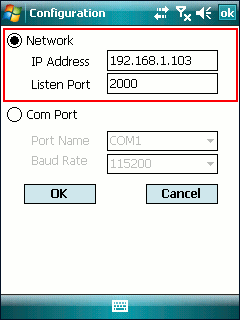
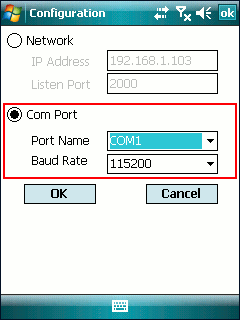
2. How to Set Connection
There are two ways for connection, Network and Com Port.
Tap Menu -> Config to open Configuration dialog.
Select one of the types below to set the parameter.
After selecting the connection type, the conncetion information will be shown at
the top-right.
The flash arrow indicates the continuous detection. It will be shown along with
the running of the application.
If the connection is failed, another arrow with red sign will be shown. The application
will continue to detect the connection status. Once the conncetion is successsful,
the arrow with red sign will disappear.
The application will keep the connection setting for next launch.
3. How to Turn On/Off Relay Manually
The light on top right of relay control panel indicates the status
of the relay. Red for relay off, green for relay on.
Tap mode button to step into Manual mode.
Tap the slider to turn on/ off the relay. The light becomes green/red.
4. How to Turn On/Off Relay Automatically
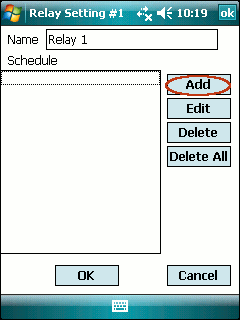
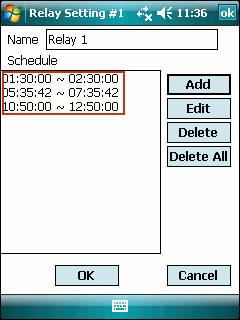
In order to control relay automatically, the schedule of relay on must be set at first.
Tap Setting button on the relay control panel to open
Relay Setting dialog.
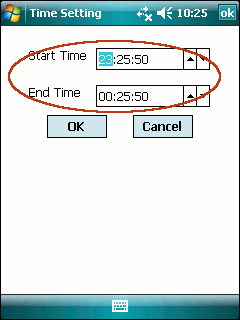
Tap Add button to open Time Setting dialog.
Input the Start Time and End Time of the relay
on. Tap OK to returen Relay Setting dialog.
Different time schedules can be added by this way.
Tap OK to finish relay setting.
The relay will be turned on automatically according to the setting time.

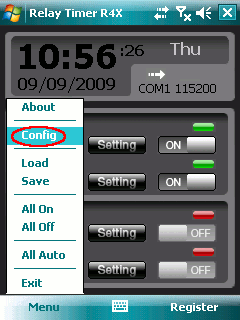
5. Main Menu
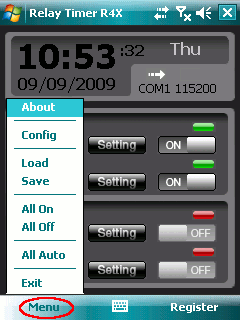
Tap Menu to show the menu content below.
|
About |
|
Tap to show About dialog. |
|
Config |
|
Tap to show Configuration dialog. |
|
Load |
|
Tap to show Open dialog to load time
setting for both relays. |
|
Save |
|
Tap to show Save as dialog to save time
setting of both relays to a file. |
|
All On |
|
Tap to turn both relays on. |
|
All Off |
|
Tap to turn both relays off.
|
|
All Auto |
|
Tap to set both relays in auto mode. |
|
Exit |
|
Tap to quit the application.
|
|