Serial Port Tool focuses on COM Port communication software for RS232 related works.
How to Use Visual Basic 2005 for ProXR

Visual Basic is our preferred language for communicating to the NCD product line. Visual Basic 2005 is an evolution of the Visual Basic language that is engineered for productively building type-safe and object-oriented applications.The Visual Basic 2005 Express Edtion is free download from Microsoft. If you are a programmer of VB6, it is easy to switch to Visual Basic 2005.

The following guide will teach ANYONE how to operate ProXR using Visual Basic 2005 Express Edition. The example provided on this page is developed for Visual Basic 2005 Express Edition. These directions are about 99% compatible with other VS2005 edition which include VB. Follow these simple steps and you will be on your way to controlling ANYTHING from your desktop computer in 30 minutes or less.

If you have questions, please contact us.


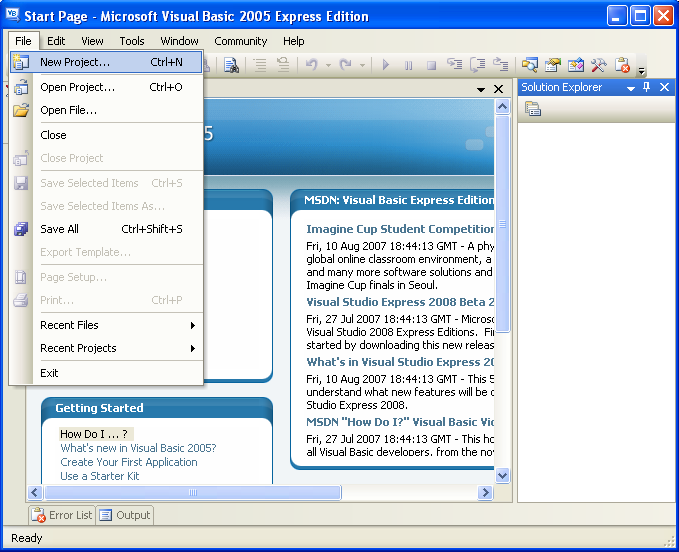
Step 1: Create a New Project
  • From the Windows Start menu, choose Microsoft Visual Basic 2005 Express Edition.
  • The following screen appears.


  • On the File menu, click NewProject.

  • The New Project dialog box opens as below.
  •  Select Windows Application .
  • Input project Name.
  • Click "OK" to get the project.
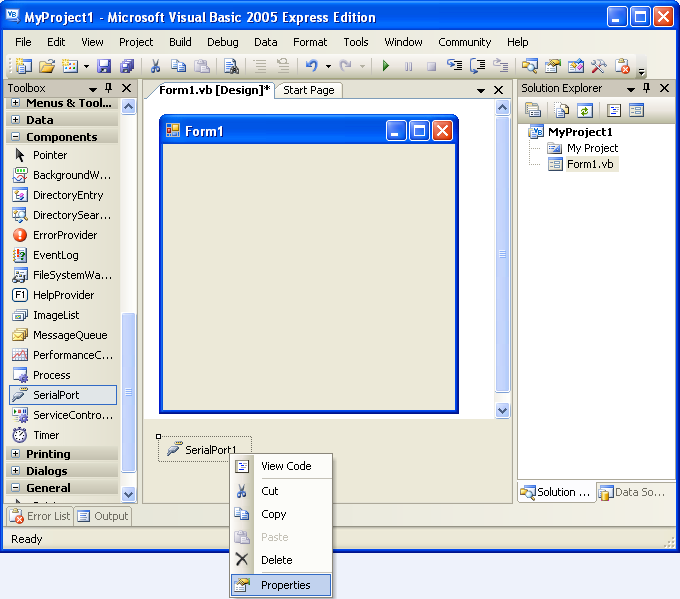
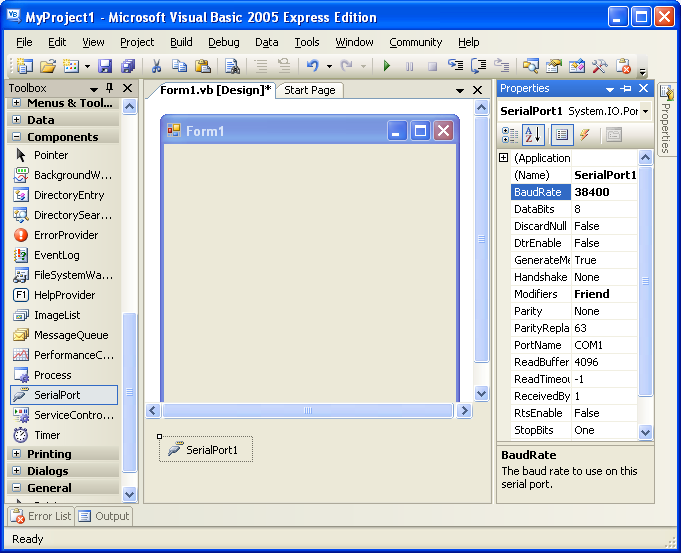
Step 2: Add Serialport Control to the Project
  • Open Toolbox window. (The Toolbox is on the left side of Visual Basic 2005. You can keep it open by clicking the Auto Hide icon, which looks like a push pin.)
  • Find SerialPort control on the Components of Toolbox.
  • Drag SerialPort control into frame Form1 to add SerialPort1.
  • Right click SerialPort1 to show popup menu.
  • Click Properties to open SerialPort1 Properties window as below.
  • Select the BauRate property of the SerialPort1. In the right-hand column, delete 9600 and replace it with 38400.


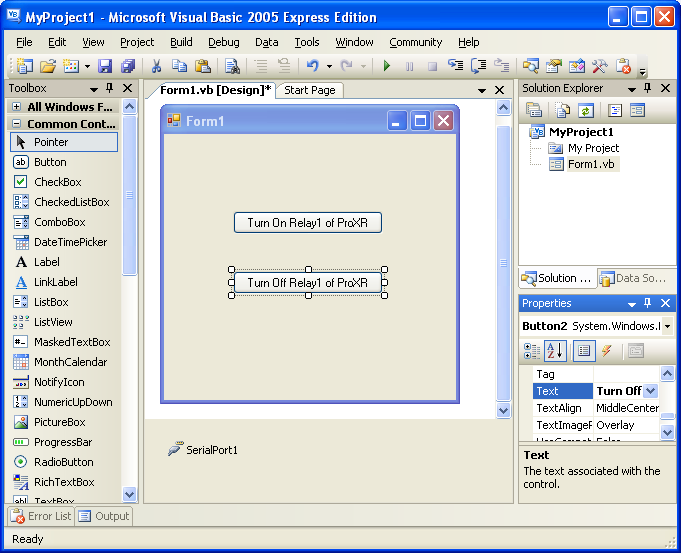
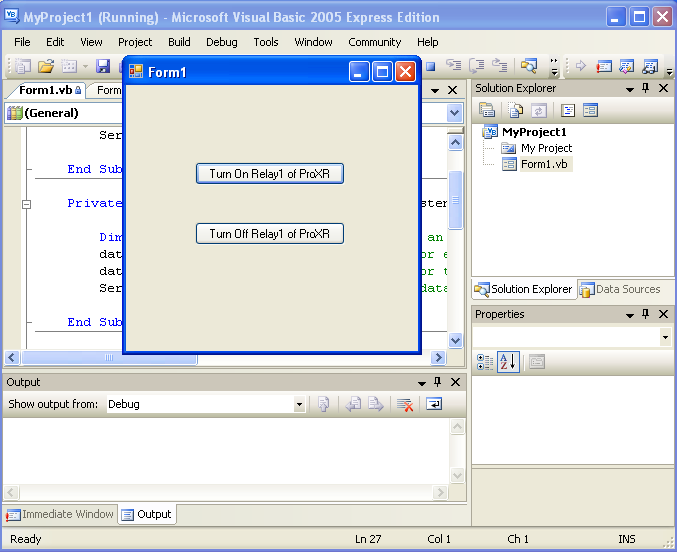
Step 3: Add Button to the Project
  • Drag Button control into frame Form1 to add Button1 and Button2.

  • Select Button1, in the Properties window, select the Text property of the Button1. In the right-hand column, delete Button1 and replace it with Turn On Relay1of ProXR .
  • Do same to Button2, replace Button2 with Turn Off Relay1 of ProXR .
  • Resize buttons to display all text.


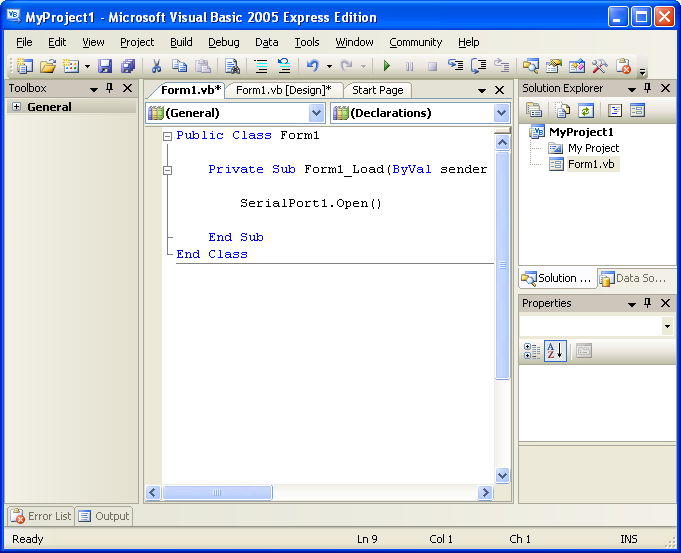
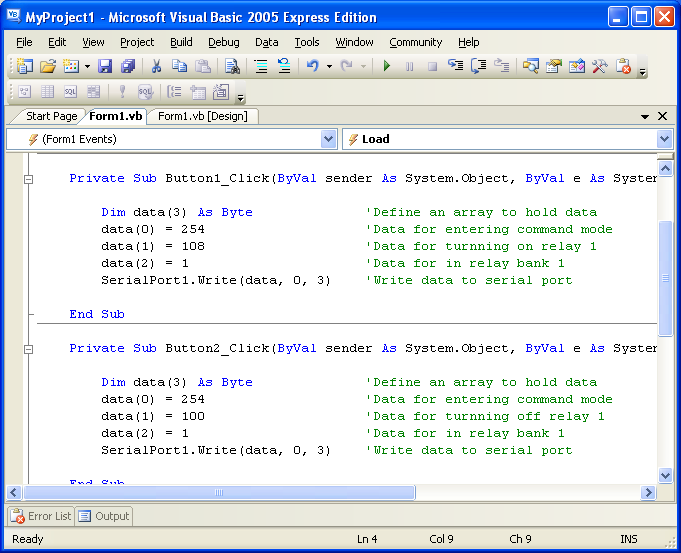
Step 4: Type code to the program
  • In the Form1.vb[ Designer], double click anywhere on the frame Form1 to open the file Form1.vb.
  • Type the following code to open the serial port at where the cursor is.
    SerialPort1.Open()


  • Return to the Form1.vb[ Designer], double click button Turn OnRelay1 of ProXR.
  • Type following code at where the cursor is.

    Dim data(3) As Byte

    data(0) = 254

    data(1) = 108

    data(2) = 1

    SerialPort1.Write(data, 0, 3)

  • Return to the Form1.vb[ Designer], double click button Turn Off Relay1 of ProXR.
  • Type following code at where the cursor is.

    Dim data(3) As Byte

    data(0) = 254

    data(1) = 100

    data(2) = 1

    SerialPort1.Write(data, 0, 3)

  • You may hide Toolbox window and Properties window to get more room to show code. You can do so by clicking the Auto Hide icon,which looks like a push pin.


Step 5: Run the project
  • On the Debug menu of the Visual Basic2005, click Start Debugging.( A shortcut to run the program is to press F5.)
  • The result of running the program is displayed as below.
  • Click button Turn On Relay1of ProXR , the first relay will be turned on.
  • Click button Turn Off Relay1of ProXR , the first relay will be turned off.


Above are all basic steps that is needed to control ProXR from VB 2005.

Based on those steps, more buttons can be added to control anything from your desktop computer.


Download VB2005 ProXR Test Program