|
Focus on
RS232 serial port communication softwares.
|
|
|
|
N-Button
Pro User Manual
N-Button
Pro creates up to 255 widgets that float on your desktop to control
external serial port or network devices, send specified data, run
applications or send HTTP request. It supports Serial Port/USB and Network connection between PC and devices.
N-Button Pro makes it possible to control your devices without any programming!
|
|
|
|
Install |
- Download N-Button Pro version zip file and unzip it.
- Bouble click setup.exe file. Follow the default instrution to finish the installation.
- The N-Buttton Pro icon will be shown on your desktop.
- Double click the N-Buttton Pro icon to run it. It also
can be run by clicking Start -->All Programes -->N-Button Pro -->N-Button
Pro
.
- N-Button Pro Manager will be shown on your screen.

|
|
N-Button Pro Manager |
|
The type of device and connection way must be
selected on N-Button Pro Manager before creat any widget to
control your device.
- N-Button Pro supports devices of National Control
Devices, ENTTEC, Velleman, Mobotix, Axis, Panasonic,Bosh IP cameras and also
other serial port/USB or network devices.

- N-Button Pro supports settings for Show Order,
Web Interface, Hide/Show Hotkey, Opacity and Background
of widgets, Auto run after login Windows,
as well as Password for opening this Manager panel. N-Button
Pro allows you to access the created widgets remotely.
The widgets can be viewed and controller through web browser.

- 11 types of widgets can be created Relay Button, Relay Status, A/D Meter,
Scan Channel, Dimmer Button, Dimmer Slider, Camera Widget, PTZ Button,
Label, Customized Button and Advanced Customized Button.

- N-Button Pro version supports up to 255 widgets.
N-Button Lite version supports up to 16 widgets.
|
|
Add Relay Button |
-
Click "Relay Button" on
N-Button Pro Manager to show Properties - Relay Button dialog.
- This dialog is used to set control action and appearance
for Relay Button widgets.
- Relay Button widget can be set to control single relay
or multi relays. It can turn on/off relays, toggle relay status, and set status
of relays.

-
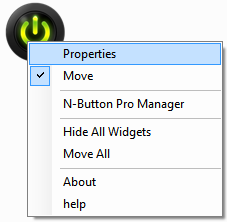
Right-click a created Relay Button, selecting Properties option on pop-up menu
to edit its properties.
|
|
Add
Relay Status |
-
Click "Relay
Status" on
N-Button Pro Manager to show Properties - Relay Status dialog.
This dialog is used to set relay ID and appearance for
Relay Status widgets.
-
Relay Status is used to indicate the specific relay's status. It has three
status, On/ Off and other(unknown). The widget will be refreshed automatically
when a relay's command is issued. If it fail to get the status of the relay, it
will show the status of unknown. Use Relay Status widgets with Relay Button
widgets together to control the relays and show their status on the desktop.

-
Right-click a created Relay Status, selecting Properties option on pop-up menu
to edit its properties.
|
|
Add AD
Meter |
-
Click "AD Meter" on
N-Button Pro Manager to show Properties - AD Meter dialog.
- This dialog is used to set relay ID and appearance for
A/D Meter widgets.
- AD Meter widget will read the value of A/D channel and show the value on the screen.
The raw value of A/D channel is 0-255. The meter can map the value to different range, like 0-5, which is voltage on A/D channel or other value you want.
The widgets can update the value at specific interval automatically as well as refreshed manually.

-
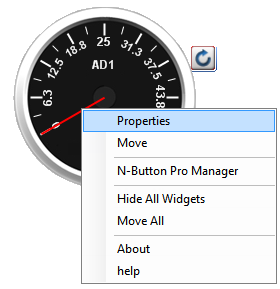
Right-click a created AD Meter, selecting Properties option on pop-up menu
to edit its properties.
|
|
Add Scan Channel |
-
Click "Scan Channel" on
N-Button Pro Manager to show Properties - Scan Channel dialog.
- Scan Channel is used to read the contact closure inputs.
It will show On/ Off and other (unknown). The widget will show the status of the contact closure inputs automatically.
If it fails to get the status of the inputs, it will show the status of unknown.

-
Right-click a created Label, selecting Properties option on pop-up menu
to edit its properties.
|
|
Add Dimmer Button |
-
Click "Dimmer Button" on
N-Button Pro Manager to show Properties - Dimmer Button dialog.
- This dialog is used to show a static text or an image.

-
Right-click a created Label, selecting Properties option on pop-up menu
to edit its properties.

|
|
Add Dimmer Slider |
-
Click "Dimmer Slider" on
N-Button Pro Manager to show Properties - Dimmer Slider dialog.
- This dialog is used to show a static text or an image.

-
Right-click a created Label, selecting Properties option on pop-up menu
to edit its properties.

|
|
Add Camera
Widget |
-
Click "Camera
Widget" on
N-Button Lite Manager to show Properties - Camera Widget dialog.
- This dialog is used to set action and appearance for
Camera Widget.

-
Right-click a created Label, selecting Properties option on pop-up menu
to edit its properties.

|
|
Add PTZ Button |
-
Click "Label" on
N-Button Lite Manager to show Properties - Label dialog.
- This dialog is used to set action and appearance for
PTZ Button widgets.

-
Right-click a created Label, selecting Properties option on pop-up menu
to edit its properties.

|
|
Add Label |
-
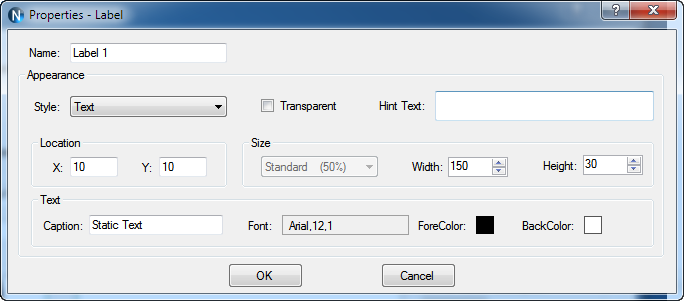
Click "Label" on
N-Button Pro Manager to show Properties - Label dialog.
- This dialog is used to show a static text or an image.
-
Right-click a created Label, selecting Properties option on pop-up menu
to edit its properties.

|
|
Add Customized Button |
-
Click "Customized Button" on
N-Button Pro Manager to show Properties - Customized Button dialog.
- This dialog is used to set action and appearance for Customized Button widgets.
- Customized Button can be set to send specified data to any other connected devices besides relay boards.
It also can be set to open a file, a folder or a program, run any application and send http request.

-
Right-click a created Customized Button, selecting Properties option on pop-up menu
to edit its properties.

|
|
Add Advanced
Customized Button |
-
Click "Advanced
Customized Button" on
N-Button Lite Manager to show Properties - Advanced Customized Button dialog.
- This dialog is used to set action and appearance for
Advanced Customized Button widgets.
- Advanced Customized Button allows you
to control different divces at same time. Several actions can be added and each
action can work for different device.

-
Right-click a created Label, selecting Properties option on pop-up menu
to edit its properties.

|
|
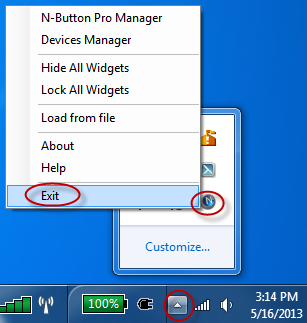
Exit |
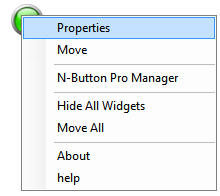
- Right click N-Button Pro icon on status bar to show pop-up menu.
- Click Exit item to quit N-Button Pro.
|
|
|